Two-X Moto
The Rebuild
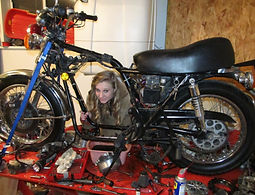
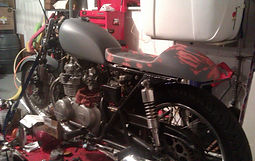
When I first decided I was going to buy a 'fixer-upper' bike, I wasn't sure where to start on the fixing up part once I had it. We decided that if we were going to go through the effort of taking apart the engine, we were going to do it right. I then ordered a few kits online--one to replace all the screws with stainless steel allen head screws, another to replace all the seals and gaskets. I was lucky that I found ones that were specific to my bike, it can get tricky to find the right seals and gaskets for an old bike. So then I slowly went through my entire bike, scrapping old gaskets aside and deep cleaning all the sludged up oil as I went. When I reached the cylinders, they were pretty scraped up and needed to be machined down so it was smooth, known as bore out. This being the case I dropped off the cylinders to Casey's Machine shop in Taylorsville UT, and picked up a larger set of pistons that would fit the new size.
I couldn't tell you how to take apart and put back together your motorcycle engine, but I could on the KZ400. The mechanics handbook that came with my bike was my best friend at the time--along with youtube and google. It's important when sealing your engine block down that you follow all the right specifications to your bike.
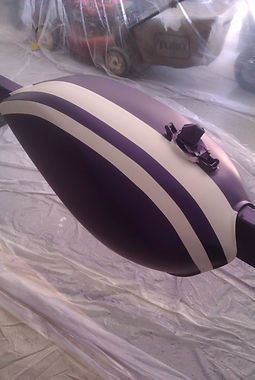
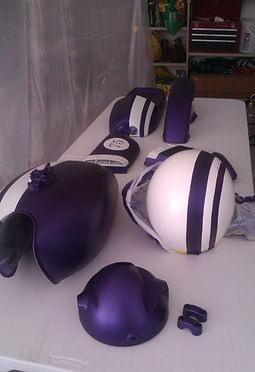
Once the mechanical part was out of the way, it was on to cosmetics. I only knew one thing for sure, I wanted my bike to be purple, so at least that part was easy. We decided to focus next on the seat pan and tail piece. In a café racer style bike, the seat pan and tail piece are typically one solid piece together. So we decided to buy 30 lbs of modeling clay and start from there. After about 6 designs, we finally decided on one we liked, the problem was what now?
Fiberglass
We knew we wanted to fiberglass over the clay, but we needed two molds--one for my bike, and one for Corey's. We both had no experience working with fiberglass and wasn't really sure what to expect. We tried covering the hardened clay in tape, so that we could lay the resin over the tape and it would stick just to the tape, therefore keeping the original clay design intact. Sounded like a good plan. On to fiberglass. . .
Remember, when messing with fiberglass and fiberglass resin, take the safety precautions seriously. Always use gloves when handling the fiberglass, we used woven fiberglass so cutting it made a mess! Make absolutely sure you wear a respirator when laying the resin on, it has some pretty heavy fumes. I learned this the hard way, and found myself laying on the garage floor light headed and a bump on the back of my head.
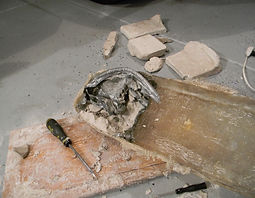
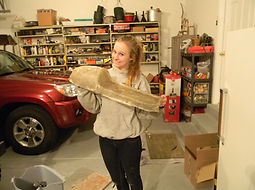
Our sloppy first time fiberglass job made us nervous--it didn't look anything like the mold underneath. Corey's attitude was: "Nah, we'll just slap some bondo on it, sand it down, and done!" So then we tried pulling the newly made fiberglass seat off our clay mold, and no luck. The resin seemed to seep through the tape and locked itself on to the clay. So we had to resort to breaking the clay apart. Which caused us to lose our clay mold for the second seat pan. So instead, once the new fiberglass seat had dried, we taped it off to use as a mold. This time we were successful in pulling the two apart once we got the second seat. So there you go, we had two seat pans made out of fiberglass. Done? No.
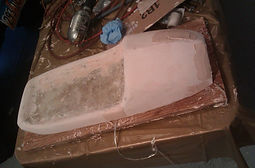
Corey's attitude of 'slapping on some bondo' just 'sand it down' was quite an understatement. First we had to sand down the fiberglass so that it would look like our original mold idea, this was a mess and left us feeling itchy for a week. Next time, I would wear long sleeves and a respirator. We then covered the whole thing in bondo, and started sanding. We kept going: bondo, sand, bondo, sand. This probably took almost a month, of any time we had an hour to spare, lay another layer of bondo, and sand it down; trying desperately to get it to look like our original idea.
Once that was finally sanded to perfection, or at least to the point where we couldn't look at it anymore, it was time to prep for paint. This also meant getting the other pieces of our bike ready as well.
Paint
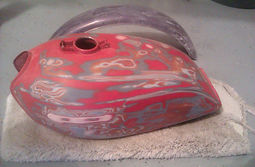
Prepping parts for paint can be very tedious, but very crucial. If you don't prep correctly you can get some major unavoidable and noticable mistakes in your paint. Even just the microscopic oil from your hands can make some major "fish eye's" in your paint. We know all these things will happen because we learned it the hard way. . . This video has some great tips for prepping your tank. I will definitely try his suggestions next time, they look a lot more simple than our instructions.
We first sanded down our tank to locate any dings and dents. You can sand it down with a fairly low grit sandpaper, maybe 800 grit. Once you locate the dings and dents then it's time for more Bondo! Lay the bondo on failry thick and sand it down with a block so you don't over do it. Once you feel like it's good enough, spray a coat of primer. The primer will let you see bigger imperfections, then you can sand down again with a higher grit to get it perfect. We did this process of laying more primer on at least 3 times.
Now that you have your tank primed and ready, prepar for paint. We purchased a paint prep formula that you would lightly wipe onto all the pieces, to clean off any oil or residue. After that use a tack rag to get any dust or particles that may have landed on it. And make sure you are painting in a secure environment. On cycletrader.com, they have an article explaining all the precautions to use if you are making a home made paint booth, Sarah H. writes:
"First of all, paint fumes can be toxic, and they are also flammable. For these reasons, the place where you are painting should not be attached to your house. . . Make sure the respirator has the right kind of filter for the type of paint you are using."
If you're spraying your paint yourself--especially if it's your first time--don't be discouraged when you see runs or imperfections. It took us many mistakes on many bikes to get a decent paint job. The experience makes it worth it in the end however, that you created it yourself.
Works Cited
"Dave Paints a Motorcycle Tank." YouTube. YouTube, 22 July 2014. Web. 30 Nov. 2015.
https://www.youtube.com/watch?v=wmbwa9QIkaM
H, Sarah. "TIPS FOR PAINTING YOUR MOTORCYCLE." CycleTrader.com. 20 June 2012. Web. 2 Nov. 2015.
http://www.cycletrader.com/research/news-reviews/custom-motorcycles/tips-for-painting-your-motorcy